Use NDI with OBS Studio

Camera for OBS Studio can send an NDI video and audio feed directly from your iPhone or iPad. The third-party DistroAV plugin adds the NDI Source that receives this feed in OBS Studio.

NDI sends high-bandwidth video over your local network. For the lowest latency and the most reliable connection, use USB. If you need NDI, connect the iPhone or iPad with an Ethernet adapter when possible.

If you use Wi-Fi, NDI recommends Wi-Fi 6 or Wi-Fi 7 equipment for higher bitrates and resolutions. Read the NDI network best practices before you start. Results depend on your network.

NDI and DistroAV are third-party integrations. They are not affiliated with or sponsored by Camera for OBS Studio.

Current requirements: DistroAV 6.2.1 requires OBS Studio 31.1.1 or newer and NDI Runtime 6.3 or newer. If a newer DistroAV release is available, follow the requirements on its release page.

Camera for OBS Studio sends its feed with NDI 5. This works with the NDI 6.3 receiver used by current DistroAV releases. The sender and receiver do not need matching SDK versions for standard NDI video and audio. NDI documents its backward compatibility.

1. Install OBS Studio, DistroAV, and NDI Runtime

  1. Install or update OBS Studio.
  2. Download the latest stable version from the official DistroAV download page.
  3. Follow the DistroAV installation guide for your operating system. Install the required NDI Runtime when the guide tells you to do so.
  4. Quit OBS Studio and open it again. NDI Source should now appear in the Sources menu.

If you used the old OBS-NDI plugin, follow the OBS-NDI to DistroAV migration guide.

2. Download and install the Camera for OBS Studio iOS App

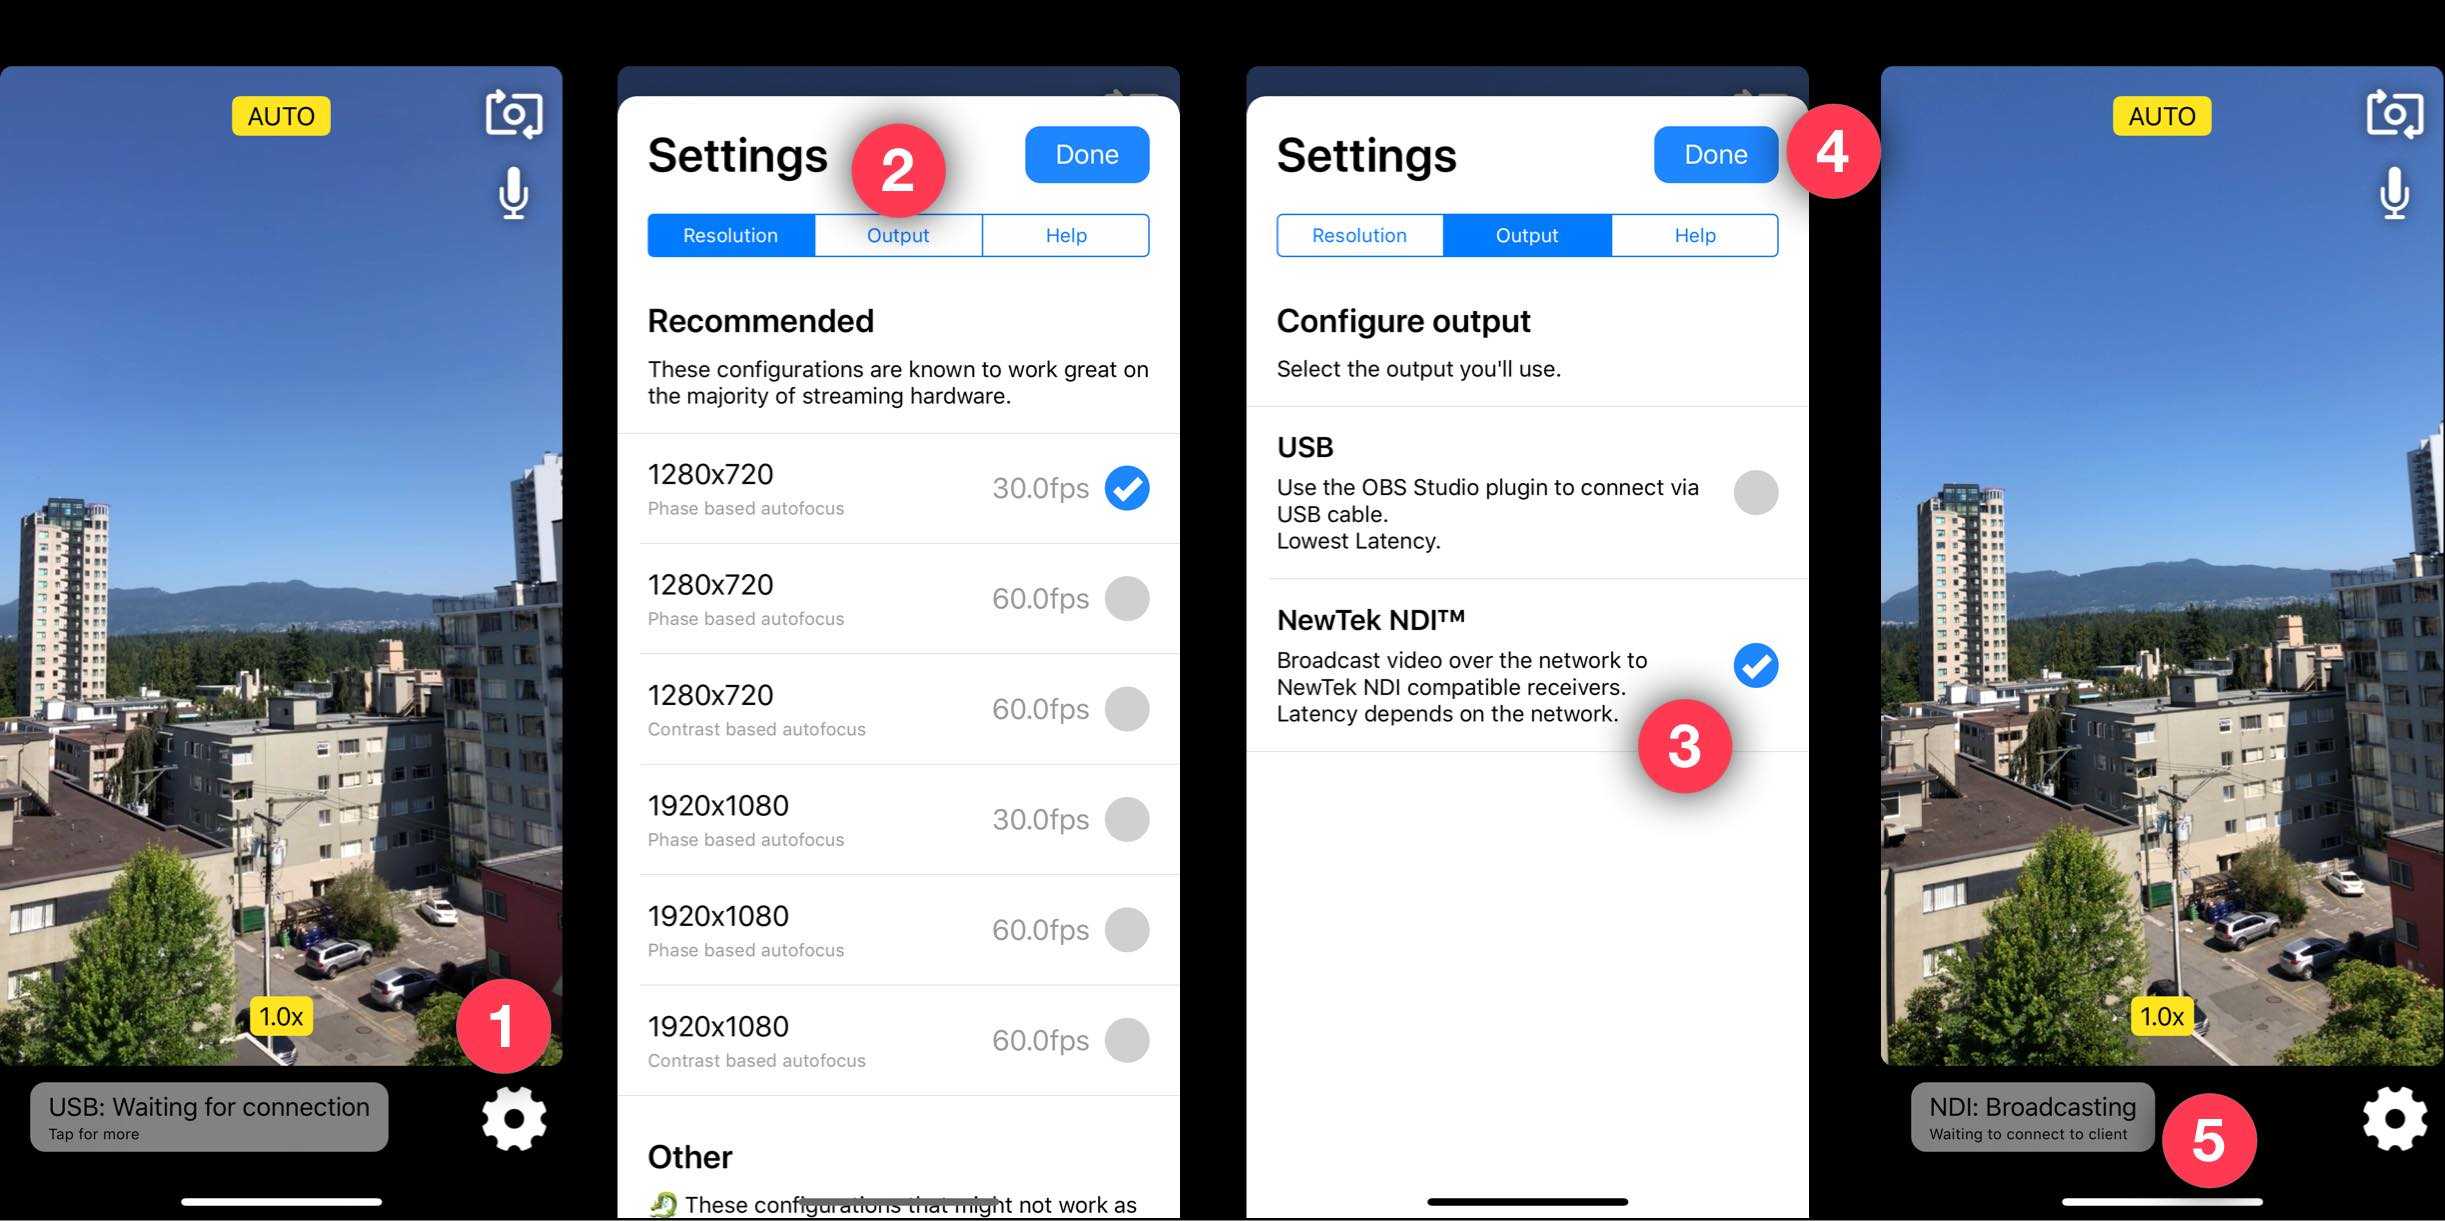
3. Select the NDI output in the app

  1. Open Camera for OBS Studio.
  2. Tap the settings button.
  3. Select Output.
  4. Select NDI. Some released versions call it NewTek NDI.
  5. Tap Done.

The status should show NDI: Broadcasting while the app waits for a receiver.

installation-steps

4. Add the iPhone to OBS Studio

  1. In OBS Studio, select + under Sources.
  2. Select NDI Source.
  3. Create a new source.
  4. In Source name, select your iPhone or iPad.
  5. Select OK.

You should now see and hear the feed in OBS Studio.

If the device does not appear

  1. Wait five seconds, then reopen the NDI Source properties.
  2. Confirm that the computer and iOS device are on the same local network. Do not use a guest network or an access point that isolates wireless devices.
  3. Keep Camera for OBS Studio open with NDI: Broadcasting visible.
  4. On Windows, set the network profile to Private and allow OBS Studio and DistroAV through the firewall. NDI uses mDNS for automatic discovery.
  5. Restart the app and OBS Studio after you install or update DistroAV or NDI Runtime.
  6. Check the DistroAV troubleshooting guide if OBS reports a DistroAV error code.

Read the NDI discovery guide if your network blocks mDNS or separates devices into different subnets.

If the video drops or stutters

  • Reduce the resolution or frame rate in Camera for OBS Studio.
  • Move the iOS device closer to the access point, or use an Ethernet adapter.
  • Select Low bandwidth in the NDI Source properties if reduced image quality is acceptable.
  • Check the NDI network best practices.